
Softlips Cube
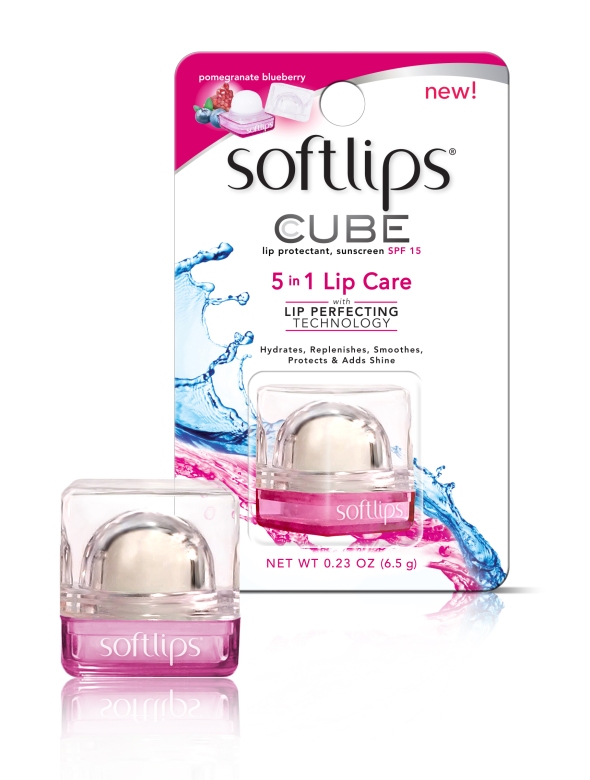
Check out the latest product launch from The Mentholatum Company, the Softlips Cube!! Not only is the cube fashionable and so easy to locate in your purse, it also is a great formula that really sooths dry and cracked lips. I love it! Click the link below to purchase.
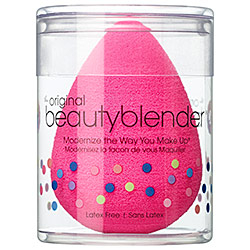
BeautyBlender
I have seen these little pink round sponges all over the place but until now was not too sure how to use it! Now that I have learned, I will never use anything else to apply foundation!! I love it!! It is a beautyblender, or bb for short, and here is the how to:
- First, saturate the sponge with water (just like you would any other sponge)
- Towel dry the bb and now you are ready to begin applying your foundation
- Apply a nickel size amount of foundation onto your hand and dip the beautyblender into the makeup
- DO NOT smear the makeup onto your face with the sponge but instead, bounce the sponge on your face all over. Use the larger end for most areas but flip to the pointed end for around your eyes, nose, and mouth

You should wash the bb after each use because it is a sponge and is susceptible to bacteria. Any anti-bacterial liquid soap will do the trick! Make sure to let the bb air-dry completely.
This bb is so much better than a brush or using your fingers to apply foundation. It gives an airbrushed look, it is fast and leaves a flawless finish!
Holiday Hair

 Do you have a special event or party to go to this holiday season? Why not make it extra special by getting your hair done in an updo! Here are some pictures of a style I did this past weekend! Some advice…if you get your hair pinned up in loose curls, you can take the pins out the next day and wear your hair down. The curls will be perfect since they have been setting for a whole day! Just gently brush out the hair and touch it up with a curling iron and hairspray! For the best results, let your stylist know that you are planning to get two days out of you hair so they can pin it up accordingly!! Happy Holidays!
How to Keep Hair Color from Fading
 Let’s face it having your hair colored is expensive so you want to preserve the color and make it last as long as possible. Here are some basic rules to keep your color looking fresh:
Basically the healthier your hair is, the longer your color will last. Conditioning your hair and using deep conditioning treatments will keep your hair from looking dry and dull.
Skip the shampooing! Shampooing your hair every day is a huge no-no!! You will literally wash the money you spent getting your hair colored down the drain! Wash your hair two to three times a week at the most. You can still wet your hair in the shower and run conditioner through it everyday just don’t scrub hair with shampoo. When you do shampoo, focus on the roots and nape of the neck where hair is the most oily.
Wear a hat! I know it is November and you all are not thinking of sun bathing but when you are out in the sun you should wear a hat or use a hair product with SPF. Sun Care Protective Hair Veil by Aveda is a great product to mist on your hair before hitting the beach.
Basically the rule of thumb is if you color your hair it is even more important to use products that promote healthy, moisturized hair. Colored hair is already compromised and fragile because of the chemicals in hair color, so be sure to take the time to do deep conditioning treatments once a week and use the appropriate color safe shampoo and sun protective products.
Movember
 Have you been noticing more men modeling moustaches this month?? That is because it is Movember! During November each year men all over the world raise awareness and funds for men’s health issues, specifically prostate and testicular cancer. The way it works is guys will get sponsored by friends, family, and co-workers to grow out their moustache for the month of November. Starting with a clean-shaven face on November 1st and ending the month sporting a full grown stache. Movember is coming to an end so I encourage everyone to donate to this initiative at http://us.movember.com/donate/. You can donate to the general cause or to an individual you know is registered. This organization is so fun for guys to be a part of. There are prizes and even the honor of becoming the Man of Movember, an award given to the most special and supportive Mo Bro! Make sure you participate in Movember 2013 as well!!!
Coconut Oil
 Recently I have been hearing so much about the beauty benefits of organic coconut oil. Coconut oil can be used for cooking, eating for extra energy, and for smoothing hair and skin. Coconut oil at room temperature is hard and waxy. For beauty purposes it must be heated into an oil. Many products on the market are infused with coconut oil but in its pure form there are many uses…
Treatment for damaged hair– One section of hair at a time, apply oil from the ends of your hair to the middle of the hair shaft. Cover your hair with a shower cap. I recommend sleeping in the treatment for the best results. In the morning shampoo and condition as usual.
Dry Scalp-Part your hair and section by section apply coconut oil to the scalp. Cover with a showercap and sleep in the treatment. Shampoo and condition hair in the morning.
Dry Chapped Skin– In the winter my hands can get extremely dry. Rub coconut oil onto hands and wrap in plasticwrap. Keep on for an hour or so. Wash your hands as normal.
You can use coconut oil on dry styled hair as a way to give shine to dull ends but I must warn you that this stuff can get messy! You only need a TINY amount of oil, otherwise your hair will just look greasy. There are other claims about coconut oil uses that I have not yet tried including a cure to acne and cold sores, and an anti aging regimen. Comment if you have any experiences with coconut oil to share!
Fake Eyelashes
 For special occasions, I love to apply fake eyelashes. It creates a look that is more than your everyday makeup and makes eyes look so beautiful in pictures.
Before applying the lashes, I recommend doing all your makeup first, including eye liner.
Here is how to DIY:
- Use the plastic packaging that the eyelashes come in as a tray. Squeeze out a little bit of eyelash glue. Let sit for a couple of minutes.
- Take the lashes and cut them in half. This makes the lashes more manageable and easier to apply.
- Bend the halved lashes back and forth so that they are more flexible. This will allow the lash to curve with the natural shape of your lash line.
- Place a fine line of eyelash glue along the edge of the fake lashes. I use a moistened Q-Tip to apply the glue.
- Using tweezers carefully sweep the glued edge of the fake lashes on top of the natural lashes. You only want to have a tiny bit of glue swept on top of the natural lash.
- Now, place the strip of the fake eyelashes exactly where your natural lash meets the eyelid. Gently push the strip onto the lash line using your fingers. Apply all 4 lash pieces (2 on each eye) using this technique.
- As you apply each piece of lash make sure you gently push your natural lash upward to connect with the fake lash. This is why we swept that little bit of glue on the natural lash before applying the fake lash. It just provides a little more hold.
- Let glue dry completely.
- Apply mascara as you would normally, pretending the fake lashes and your real lashes are one! This helps to blend the natural lashes with the fake.
The lashes can be removed at the end of your event using a combination of makeup remover, face wash, and a warm wash cloth.
Caviar Mini Bar!!

 Now you can add even more texture to your nails, and more excitement to your manicure! The Ciaté Mini Bar comes with 4 solid colored nail polishes and 4 different colored beads. The tiny beads create a cool 3D texture on your nail like nothing else that you have ever seen!
What you do is paint your nail like normal with the solid color polish. After the second coat of polish, you pour the beads generously over the wet nail polish. Gently push down on the beads and let dry.
One downfall is the beads do not stay on for long. Washing your hands, dishes, hair will definitely cause the majority of the beads to fall off. BUT this is great for a party/holiday. The white beads are perfect for New Years Eve! This kit was $30 at Sephora and it is a great value! This kit will last a long time especially if you make sure you use the plastic tray and mini funnel to put the excess beads back into the polish container.
I have not seen this product in salons yet but I think it is only a matter of time! This is a great add-on service to any manicure! Applying the beads is easy and definitely DIY!
Beauty School
 In New York State, to receive a cosmetology license you have to complete 1,000 hours in a NYS approved cosmetology class, and pass a written and practical exam administered by the state. The practical exam tests ability to complete skills such as roller sets, permanent waves, pin curls, finger-waves, hair coloring, hair cutting, and blow drying. The student brings in a live model for the examination and has to complete the skills mentioned in a certain amount of time. You are probably wondering what in the world a finger-wave is, and who in the world still wears a pin curl style??? The skills that the state tests are really old-fashioned but I suppose if you can complete these styles you will likely be able to create more up to date styles.
I attended cosmetology school at the BOCES center in high school. I spent the mornings of my junior and senior year at the BOCES center completing the 1000 hours of classroom time necessary to be able to receive a license. The program involved half lecture and half technical time. On Friday’s the classroom would turn into a day spa where people from the public could come into the school and receive extremely discounted services from the students.
I was definitely lucky to be able to complete this program in high school. Private cosmetology schools can cost upwards of $15,000 but through the BOCES program it was free for the same education. Truthfully the 1,000 hour course will really only help you pass the state board test. When you enter the field working is when you really learn how to do hair! I recommend getting the 1,000 hours of training in the most economical way possible and then when you start working as a stylist further your training at seminars that pertain to the skill you want to be an expert at. Color is one of the most profitable services as a hair stylist. That is why you often see the title “Color Specialist” in salons because many stylists attend further education classes in this area in hopes to expand their color clientele.
Crushed Velvet Nails
 “Leading the way in nail art innovation, the latest kit from cult British nail brand Ciaté® brings decadent luxury to your fingertips. Featuring luxurious crushed velvet, this kit was inspired by excessive layering of exuberant textures, which was featured in fashion shows around the globe. The result? A truly unique, sophisticated, strokeable finish” -sephora.com
This kit can be found at Sephora, it includes a deep purple nail polish, the velvet powder, and a brush. What you do is paint one coat of the purple polish on like normal. Let dry for a few minutes. Next, you do the second coat of polish, one nail at a the time, sprinkleing the velvet powder on top of the wet second coat of polish. Brush off excess powder.
I tried this kit today using the instructions provided and I was not completely pleased with the results. The reason isthe velvet powder was barely coming out of the shaker. Next time I use this kit i would transfer the powder into a shaker that would allow for a more generous layer of powder. This kit was $19.00 at Sephora. It is a nice change since sometimes nail polish gets boring! Even if the velvet finish does not last the purpel undertone is really pretty, perfect for fall!!! I hope that the next application is more velvety!
Eyebrow Threading
Me and eyebrow threading have a love hate relationship. For years I had been waxing my eyebrows and because my skin is so sensitive I almost always ended up with a scar from the wax. With threading, I leave the salon with some redness but never a scar like with waxing. Also, I prefer eyebrow threading now because the shape of the eyebrow is defined and perfect! The reason that I hate eyebrow threading is sometimes (depending on how experienced the threader is) it hurts way worse than waxing!
Threading involves a thin, twisted cotton thread plucking the hair at the follicle level. Unlike tweezing, where single hairs are pulled out one at a time, threading can remove an entire row of hair, resulting in an accurate and straighter line. When you get your eyebrows threaded you have to tighten the skin by pulling the skin under your eye down, and above the eyebrow up.
If you are looking for a threading studio try the mall. Typically these studios are in mall kiosks or small store fronts. For those of you wondering what in the world I am talking about, check out this video. It is my sister Jill getting her eyebrows done at the mall!
Perfect Red Lips
 I love red lipstick around the holidays!! It i
 s important to have smooth lips before applying lipstick (especially red!). I like to use Mary Kay’s Satin Lip Set. It comes with a mask and a balm. First, apply the Mask and let set for about 3 minutes until dry. Remove the mask with a warm wash cloth and apply a little bit of the balm if your lips are dry.
Next, its time for lip liner. Red lipsticks tend to spread beyond the lips so it is important to have a good waterproof lip liner. I like MAKE UP FOREVER in the color 8C. Apply the liner to the parameter of the lips, paying special attention to make sure you are creating a symmetrical shape.
Now time for the lipstick! I like the shade Absolute Rouge by LANCOME. It is the perfect mix of matte and shimmer. Apply using a lip brush! Both the lip liner and lipstick can be found at Sephora. Through out the day apply Softlips Lip Balm to be sure lips do not become chapped and dry! Enjoy!!
Welcome to Hair Brush School
 The size of your styling brush depends on the desired style and length of your hair. In terms of round brushes, the longer the hair the larger the diameter of the round brush. There are so many different types of brushes on the market…so what ones should you include in your brush collection? Let’s go to brush school…
1. The Paddle Brush- This brush is perfect for a style that is smooth and sleek without a lot of volume. This brush is best for longer styles. I like to use the paddle brush, when blow drying, to get the majority of moisture out of the hair before using a round brush.
2. Soft Bristled Round Brush- This brush is gentle on tangles yet gives enough tension to smooth out wavy hair. Using this brush will help achieve a volumous style with shine because of all the bristles smoothing out every strand of hair.
3. Thermal Round Brush- This hair is like a curling iron when it heats up. Thermal means that the brush has a metal barrel which conducts heat to the hair from the blow dryer. This can speed up blow drying and create bouncier curls.
4.Combo Brush- This brush has both boar bristles and nylon bristles. The combination of bristles makes this brush versatile in that it can create styles with curl and lots of volume or a straight sleek style.
5.Bangs Brush-Sometimes bangs can be extremely unruly (as in you wake up and they are sticking straight up in the air) so you need a brush that provides a lot of tension so you can put them back in place! If you would like a curled under bang use a smaller version than the brush in the picture. The brush size shown is more for a straighter look for a side swept bang or blunt straight bang.
6 & 7-Smoothing Brushes- For smoothing down fly aways or putting hair up in a pony tail this type of brush is great. Stylists would use this brush for up-dos.
Celebrity Blow Out
 The best trick for achieving a salon blow out style without leaving your house is velcro rollers. All you need is about 6-10 rollers (depending on how thick your hair is) and some metal roller clips. The size roller to buy depends on the style you would like to create! If you purchase your rollers at Sally’s Beauty Supply, ask an employee to help you pick out the proper size. Velcro rollers create so much volume, and they are so much better for your hair than a hot iron! Here is the how to:
- Wash & condition hair
- Towel/air dry hair as much as possible
- Blow dry your hair until it is only slightly damp (if you do not blow dry your hair most of the way, the rollers will never set)
- Next, section off your hair starting in the front and center. Do not make the width of the section of hair longer than the diameter of the roller.
- Do a single row of rollers going down to the nape of the neck. Fasten rollers with metal roller clips. Remeber, the direction that you roll the roller will be the direction your hair will laywhen you take the rollers out.
- Add 2-4 rollers to the side sections
- Let dry for as long as possible!!
- Remove rollers and brush out hair with a soft bristled brush.
I recommend keeping the rollers in for as long as possible. Sleeping in these things can be unrealistic but this will acheive the best results! Make sure you adjust how much you blow dry your hair based on how long you can devote to keeping the rollers in. If you need to speed up the process hit each roller with a blow dryer! I also, recommend spraying each roller section with a volumizing hairspray for more hold.
Blow Dry Your Hair Faster
 I bought my Goody QUICKSTYLE brush at Target for $11.99. The idea for this brush is to shorten blow dry time and ease detangleing of hair. The brush has microfiber bristles that are supposed to soak up extra moisture in the hair. When I saw this I definitely wanted to try it because anything that speeds up getting out of the house in the morning is more time to sleep! Also, the less time you have the heat of a blow dryer on your hair, the healthier it will be!
I have not had this happen yet, but the instructions warn that the bristles may begin to look flat. They suggest washing the bristles with warm water and shampoo, and letting the bristles dry face down to bring them back to life. Don’t worry about bacteria because the bristles are protected by antimicrobial properties to prevent growth of mold and mildew (of course I did not even think of this when I purchased it, but I am glad Goody did!!).
I highly recommend this brush for parents that have daughters that hate having their hair brushed because of the tangles. The brush really does help make detangleing hair painless! Not to mention the look of the brush is cool so that might get kids interested in brushing their hair?? Anyways, I really like this brush! It’s a good idea from Goody!!
Trying to grow out your hair??…
 Add Not Your Mother’s- Way To Grow Long & Strong Shampoo and Conditioner to your Ulta shopping list!! The key to growing your hair out is to keep your hair healthy and strong. Hair grows, on average, about a half-inch per month. If you have damaged ends, and have to get a trim every 6 weeks, growing your hair out can take forever!! I purchased Way To Grow Long & Strong Shampoo and Conditioner last weekend at Ulta and let me say I LOVE it. This shampoo and conditioner is infused with essential vitamins, herbs, and bioactive extracts. The claim is that the shampoo will promote healthy hair which ultimately leads to hair growing faster than it would damaged. Since I began using these products my hair does feel incredibly soft and healthy. These products smell really good too! The best part…this shampoo and conditioner only cost $6 per tube! The formula is thick which means you do not have to use a ton of product per wash.
Using professional shampoos and conditioners may seem more expensive than picking up whats on sale at the grocery store, but you will notice that the non-professional products are extremely watered down and you will have to use so much more product for each wash. Spending the extra money on a salon formula is worth it because the product will last longer and your hair will be more nourished. The good news is the Not Your Mother’s products are salon grade without the high price!
Next, I would like to try Not Your Mother’s- She’s a Tease volumizing hairspray. It is infused with apple blossoms and bamboo!!!
How to Choose the Perfect Shampoo & Conditioner
 I found a great quiz on Aveda’s website: http://www.aveda.com/supercat/index.tmpl?CATEGORY_ID=CAT5290&takeQuiz=hairAdvisor.
For those that don’t know the brand, Aveda offers hair care and skin care products that are as organic as possible. Although this quiz is made particularly for Aveda’s hair care products, this template is a perfect example of the types of questions your stylist should be asking you when helping you choose the perfect shampoo and conditioner. There are three components, that when combined, can lead you to the perfect products: hair type, desired condition, and desired style. There are products available for fine, medium, and coarse hair so it is important to know your hair type. Next, you need to decide your desired condition, would you like to add moisture, create volume, protect color from fading? Describe your hair needs to your stylist so they can help you achieve that result. Lastly is desired style, do you want to have smooth straight hair, create volume, create shine? Knowing the answers to these quesitions will help your stylist lead you to the correct shampoo and conditioner for your particular hair. If your stlyist is not asking you, ask them! It’s important to come home with the right products.
The Sock Bun
The sock bun is a trend inspired by the sleek, voluminous, bun worn by celebrities like Kim Kardashian.  Today I tried the sock bun for the first time on my sister’s hair. It took a few tries but in general it was easy and can be a DIY style. Here is the how to!
- First, you take a sock and cut the toe closure off
- Next, roll the sock all the way up so it looks like a dough-nut
- Pull your hair back in a high pony-tail
- Take the sock and pull the pony-tail through the hole, leaving the sock at the ends of the hair
- Roll the hair/sock all the way down to the base of the pony tail
- Secure any loose hairs with bobby pins
The sock gives your hair 100x more volume that a normal bun and you cannot even tell it’s there! The bun is very secure so you do not have to worry about your sock being exposed throughout the day.

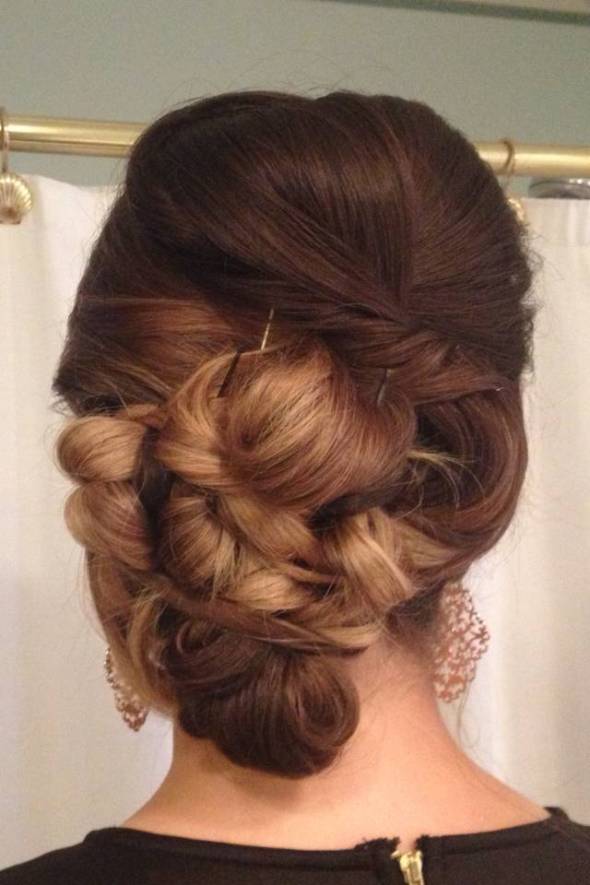
One more updo!!
About 60% of you voted that you do your hair yourself for formal events. This is probably due to the fact that a formal style in a salon can cost anywhere from $50-$75. That is a big price to pay for a style that will only last one night! From a stylist’s point of view I do understand wh ere this price point comes from. An updo style is a piece of art and does take upwards of one hour to complete. I have one more bridesmaid hair style to share with you as this wedding season comes to an end!! This Fall, the trend is to have hair to the side. It is very flattering for pictures from all angles!!
Up Do Part II
 Another style I created over the weekend! Let me know what you think!
Formal Hair
 Last Saturday I helped do hair for a wedding party and also for my sister’s homecoming dance. Many brides enjoy the comfort of their own home by hiring a stylist to come to them. This makes the day much easier and less hectic. Also, having a stylist on hand in case of a hair emergency is always good! Today I would like to share some of my own work!! This picture is my sister’s up do that I did for her dance. There are only a handful of opportunities you have in life to go all out with your hair!! For most of us these days are limited to school dances, weddings, and the rare black tie event you may be invited to. So why not pull your hair back in a style that makes a statement. Many woman like their hair down or only half up for formal events but to me…this is too much of an everyday style. Next time you have a formal event go for the all up style! You will receive so many compliments and feel like a movie star for the day!!
Salon Tipping Advice

- Commission- This is when a stylist gets paid a percentage of the total dollar amount of services they perform. This commission varies by salon and can range anywhere from 30 to 80%
- Independent Contractor- This is when a stylist rents space at a salon. For example, the chair rental may be $500 per month. The stylist then keeps the money from all services performed that month and pays the $500 to the salon owner. This is not the only cost involved though. Often times stylists that are paid this way have to buy all their own products and tools.
- Flat Rate Wage- This is when a stylist gets paid a flat rate, often times minimum wage.
Men’s Haircuts
 nd the hair length for reference.
- 0A 3/64”
-
1 3/32”
-
1A 1/8”
- 1 ½ 5/32”
- 2 1/4”
- 3 ½ 3/8”
- 4 1/2”
- 5 5/8”
- 6 3/4”
- 7 7/8”
- 8 1”
